- Saturday, June 29th, 10am-4pm
- Wednesday, July 10th, 10am-4pm
Monday, June 17, 2013
Have any unfinished scrapbooks?
Wednesday, December 7, 2011
It's a Giveaway Day!
This prize package includes everything you need to make a special, sure-to-be-loved gift! Just add pictures!!! The pages are ready to go, complete with beautiful papers, stickers, and photo mats. In addition, you will receive a Tape Runner adhesive dispenser for attaching your pictures to the pages. Once your album is complete, Page Protectors slip on to add the finishing touch. All of this is worth nearly $72.
All YOU need to do is gather up your pictures, get them printed, and stick them down.
See how the photo mats are the perfect size for 4x6 photos? You can also add your own captions and sentiments directly to the pages. Cute and easy and memorable!
Be sure to check out Modern Parent to get yourself into the drawing for this sweet gift. You can also visit {& Like!} my Facebook Page, too! And if you don't win... well, I have lots of other options for you! Who in your life would appreciate a lovely little scrapbook made just for them?
Thursday, October 27, 2011
Shhhhh.....
Thursday, October 20, 2011
Custom Photo Gifts
With just a few of your favorite photos, you can have gorgeous, one-of-a-kind gifts that will be treasured.
Gift ideas include Calendars, Metal or Acrylic Photo Panels, Quick Albums (just add photos, all the work is already done), Custom Scrapbook Covers, T-shirts, Mugs, Mousepads, Posters, and more!! I can also help you with an assortment of gorgeous, custom cards for any occasion!!

Watch a video here to see how you can use Creative Memories software to create your own custom calendars... and here is the link to the software for Mac & PC. At just $64.95 it is a great deal for all it does!! {Plus, you can try it out for 30 days, for free.}Tuesday, October 4, 2011
This is SO Cool!!!
Last week, I literally opened up the template at the Creative Memories Digital Center, uploaded my photo, dragged it in, cropped it, and added my text, and placed my order.... all in about 15 minutes before I headed out the door to flag football practice. Today, just a week later, it arrived on my doorstep! I was not prepared for how stunning it would look in person!!! These pictures truly do not do it justice.Wednesday, September 14, 2011
Going with the flow

I was determined to conquer my paper piles in the kitchen. I was really looking forward to clear counters. But life didn't quite go the way I had planned.

Gil took Monday off from work. Jacob had been sick over the weekend and was still feeling badly. So we kept him home from school and took him to the doctor. Poor baby has strep throat. Gil decided to spend the afternoon mowing the lawn. As he came into the garage after, he noticed water all over the gargage floor! Water was pouring out of the hot water heater in a steady drip. The troops {Zachary & Abbie} were called in to help move stored boxes and carry wet books into the house.

I am doing my best to save the books that I can, grateful that only a few boxes of books were damaged. We should have a new hot water heater tomorrow. We are going into our third day without hot water. The kids don't mind the lack of showers.

Time to heat some water on the stove so I can wash some more dishes. All the clutter around here is driving me just a little crazy. But first, I think I will make another scrapbook page!
Monday, June 13, 2011
Fun Cutting Tools
I love my Jumbo Custom Cutting System Patterns for making quick, traditional scrapbook pages! With one simple cut, I get a neat border, plus a piece to add to another page. Two pages from one piece of paper!
I have been working on Jacob's toddler pages... really enjoying my trip down memory lane! Here is a page I love, using the circle that was left over when I cut a border for another page, using the Jumbo Circle Pattern.

Now, when I started out with that red circle all by itself, it looked a little too much like a Japanese flag!
So, I decided to cut it up, and shift things around a bit. I started with one straight cut off of one side... no need to be exact.
I then made a second cut of of the larger piece. Again, just eyeballing things.
I took those 3 pieces and arranged them so that all the straight edges and corners were against the outside of the page.
I added a photo mat, 3 pictures, some fun embellishments, and some title stickers. {Using a Power Palette ensures that everything matches, and really cuts down on time!} I think it turned out pretty cute, and only took about 10 minutes!
You could do the same thing with any of the cutting patterns. {Good news! Through June 30th, 2011, all of our top cutting tools are on sale for 20% off!}Monday, March 7, 2011
Our evening at a French cafe!

Friday, November 12, 2010
A giveaway and my Open House is coming!

I have mentioned many times how much I love Paper Album Kits! Well, here is an exclusive Give Thanks Paper Album Kit that you can only get by visiting my friend Nicki's blog! I have the pleasure of sponsoring a giveaway over there starting today --- leave a comment on her blog and you might be the one who is blessed with this gorgeous little kit when she draws a name on Monday! You will just love Nicki's heart for the Lord, her transparency, and her love for her family.
And if you are visiting me from Nicki's blog, welcome! I love visitors!!!
I hope you will consider attending my Open House next week! I can't wait to show off all the fun ideas for fast, easy, and meaningful gifts. I will also be unveiling my Winter Schedule with workshops, Faithbooking Classes, Mommy & Me Classes, and more! I'd love to do a fun and inspiring Photo Solutions Party with you, too... you get credit towards photo processing, photo gifts, or free products -- your friends get a night out, photo-taking tips, and easy ways to enjoy their pictures now.
Thanks for stopping by! Be sure to go visit Nicki and enter to win the gorgeous Give Thanks Paper Album Kit!
Saturday, November 6, 2010
A day Full of Love!
"My albums aren't an art gallery. They're a celebration of the moments in the photos and the memories they contain."
I am half way through reading this wonderful book by broadcast journalist Nancy O'Dell! I came across this quote and had to stop and write it down. I love it! I am having a lovely birthday afternoon... sipping hot tea, sitting cozy under a comfy quilt, and actually taking time to read a book. I'm so thankful to my family for this day!!! {I'll share more about this book later!}
Saturday, September 11, 2010
Croptoberfest is coming!

School is back in session, you’re packing away all of your summer beach gear and the nights are getting cooler (perhaps your air conditioner is even getting a rest). Autumn is the time we get back into the routine of life, while reflecting on the fun (and sometimes craziness) of summer.
Fall is the perfect time to reconnect after the fast pace of summer and share memories while working on completing some photo projects. My Croptoberfest event is going to provide the ideal opportunity to do both. I'm also excited about all the new products, photo solutions, and ideas I get to share! We are going to have a great time! Will you be attending Croptoberfest?
Wednesday, July 7, 2010
Easy Power Layouts
Power Layouts is a method that is used to pre-plan an album using a sort of assembly-line process. It is one of my favorite speed techniques. When I am making a custom album for a client, I always start the project by doing Power Layouts for the whole book. When I am working on my own projects, I do the same. I have a number of customers who are very successful with keeping up on their albums because they have learned to make use of Power Layouts!
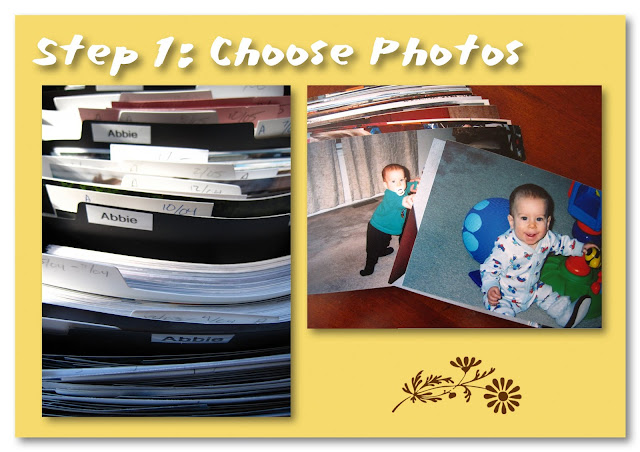
Step One: First you choose the photos you are going to use. It doesn't have to be every picture in a stack. We went into Abbie's Power Sort Box and picked out photos from the first several months of 2004. She immediately rejected any picture in her pile that didn't include her! The point is to narrow it down so that you are using the best pictures to represent an event. I try to keep in mind that each page will typically include 2-5 pictures. I also tend to limit most events to no more than two pages. Also, some photos won't fit into an event category, but are still worthy of going into an album. Go ahead and choose them, too!
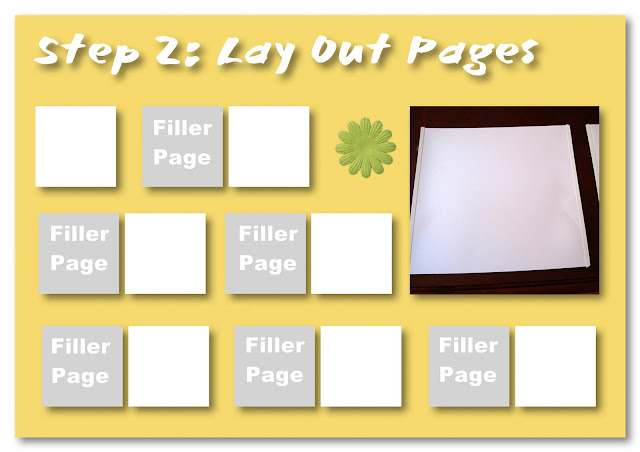
Step Two: The next step is to lay out planning pages to start the Power Layout process. I use a combination of scrapbook pages and Power Layout Guides that come with the Power Layouts Kit. The white pages, above, represent scrapbook pages. The grey can be another scrapbook page, or a Power Layout Guide. The guides are nice because when it comes time to assemble the pages, you will only be attaching paper and pictures to the actual scrapbook page... with Guides, you won't make the mistake of attaching your layout to a filler page. I also lay out the planning pages so that I have my first page of the book, and then a series of two-page spreads.
Now, this step can take up a bit of room. But it is adaptable to whatever space you have available. You can do Power Layouts on an empty table, or across several tables. You can lay out pages in small batches using up the space you have, going through all of the following steps, then repeat the process. In my custom albums, I used lay out 90 pages on the floor, snaking around the house from the entry to the living room, to the dining room, and back again to the entry!
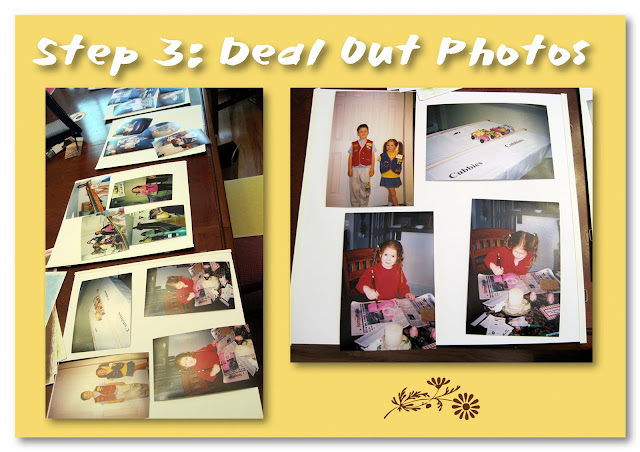
Step Three: The third step is to deal out all the photos onto the pages and Layout Guides. This is a quick process that gives you an overview of your album! At this point you will see if you have too many pictures for one layout, and how many two-page spreads you might need. You will also eliminate some pictures as you see that they may be redundant, or not as good as some others you have.I like to have two-page spreads... so in this step, I can see if some of my layouts fall that way or not. I usually scrapbook chronologically, but I will rearrange the order of my pages, if necessary, to get my layouts to fall into two-page spreads. I also see if I have random photos that will group together into topical layouts. For instance, last year I had photos from three separate snow days. It made more sense to group them all into one snow layout. Power Layouts has the advantage of giving you that big-picture view of your scrapbook so that you can group photos in a way that is most efficient for the flow of the book.
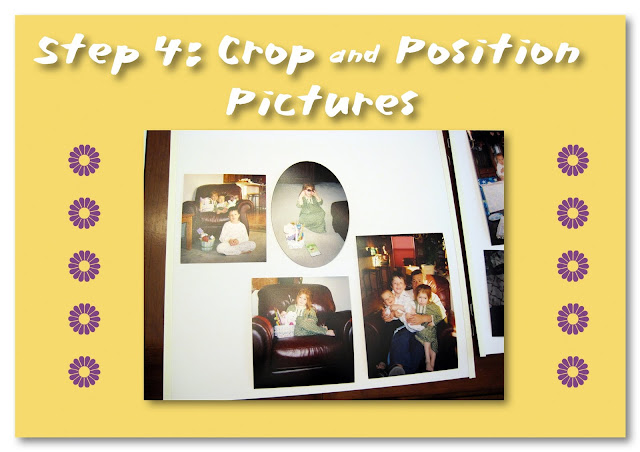
Step Four: The fourth step is to crop, or trim, all the pictures that have been dealt out onto the planning pages, and to make a preliminary arrangement of the layout on the page. My preference is to group the photos close together, leaving open areas around the page for journaling, embellishments, and titles. I did notice that once I started printing digital photos, my need to crop my pictures was dramatically reduced. But these older pictures needed some help to remove background clutter and focus in on the subject. If you have any memorabilia, this would be the step to add that, as well.
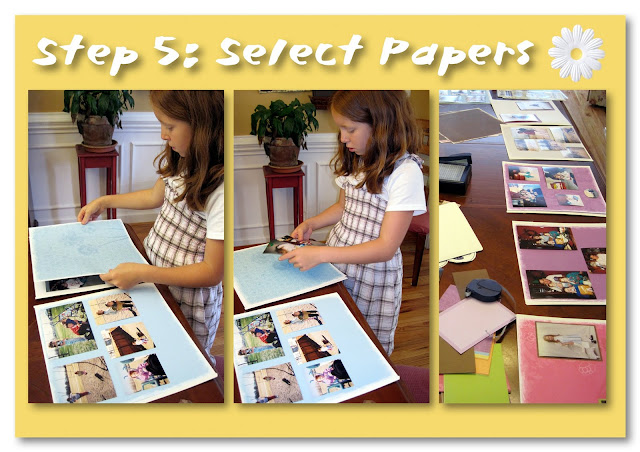
Step Five: Now the fun begins! In step five, we start to choose the papers that will go with each page. Sheets of scrapbook paper can be left whole, or cut down to make it go further. You can stop with choosing the background paper, or also go ahead and choose the mats, journal boxes, stickers, and other embellishments that will go on the page. Those items will be be dealt out onto the pages, ready for the assembly step.
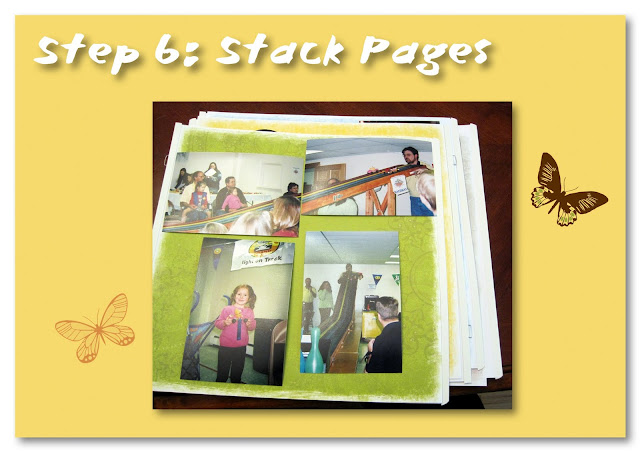
Step Six: In Step Six, you are basically done with Power Layouts! You stack up the planned pages, with the first page on top and the last page on the bottom. You can then store them in the box that comes with the Power Layouts Kit. Some people do this step at home, then just bring their Power Layouts Box with them to a workshop and assemble their pages. I have other croppers who do Power Layouts on 6 or 8 pages, complete the pages, then do Power Layouts again. Some like to do a batch of Power Layouts at my workshops, then do their assembly at home. It is all about what works for you!Step Seven: This is the time to be creative and play! The first steps of Power Layouts are where a lot of decision-making is done and less creativity is needed. In this final step, you are assembling the pages, and adding decorative touches. You will pull out the first page from the Power Layouts Box, adhere it and complete it, turn it over, and then continue on with the next layout in your box. It is great because if you just have a few minutes, you can pick up where you left off and complete a page. Some people say they don't have room to scrapbook, or don't want to pull everything out... well, with this step all you need is your Power Layouts Box, and adhesive!
Abbie did great! We spent about 15 minutes on the Power Layouts. Less than 3 hours later, she had TWELVE completed pages!!! Are you ready to try some Power Layouts for yourself???
Monday, July 5, 2010
Preparing for a Productive Retreat!
Only 18 more days until our crop retreat at the beautiful beach!!! Ten of us will enjoy a great weekend away. We will have fabulous food, great girlfriend time, the opportunity to relax and enjoy the wonderful setting, and also get some scrapbooking done. I can't wait!!!Every year my mom attends quilt camp, which is basically the same concept as a crop retreat. She comes home refreshed and feeling like she got a lot accomplished! Before she goes, she decides on her projects, cuts out all her fabric blocks, and organizes her supplies. When she gets to the retreat, she is focussed on her sewing: getting it done! Do you ever get time away to work on your hobby? Maybe it is not an entire weekend... maybe it's just a night, or an extended day, or even a weekly date with a friend. How can you make that time as productive as possible? I think preparation is the key!
The more you plan and prepare beforehand, the more you will accomplish at the retreat. Your number one goal should be to have a good time and enjoy your getaway! I usually never accomplish as much as I hoped to, but I always come home loving all that I got done!!! What helps you to be productive with your cropping time? |


Only 18 more days until our crop retreat at the beautiful beach!!! Ten of us will enjoy a great weekend away. We will have fabulous food, great girlfriend time, the opportunity to relax and enjoy the wonderful setting, and also get some scrapbooking done. I can't wait!!!